Import Points in CSV Format to QGIS to Create Point Shapefile and Join Attribute Table
Points in CSV (comma separate values) format with Northing/Easting or Longitude/Latitude can be imported to QGIS and then be saved as a point shapefile. A point CSV file can also be imported to QGIS to created a line or polygon shapefile – refer to this post.
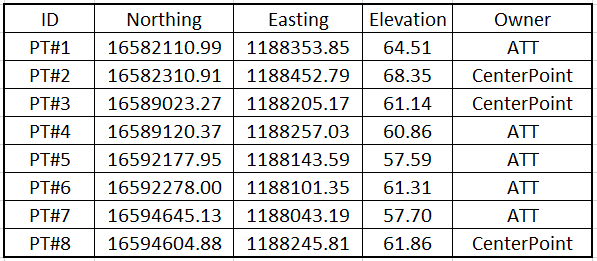
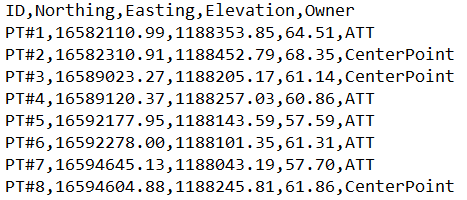
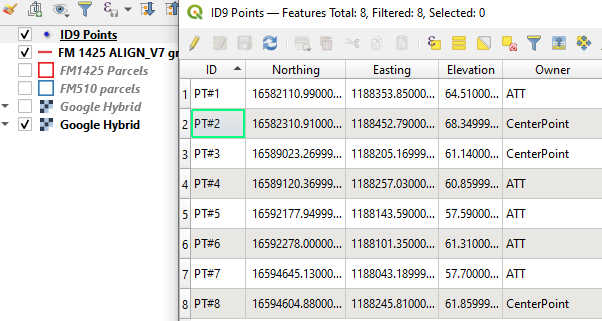
Suppose there is a CSV file generated by field SUE (subsurface utility engineering) work to show test hole northing/easting, pipe elevations and owner information as show in Figure 1 (CSV, formatted) and Figure 2 (CSV, not formatted). The points’ coordinates are in Texas State Plane Coordinate System South Zone.
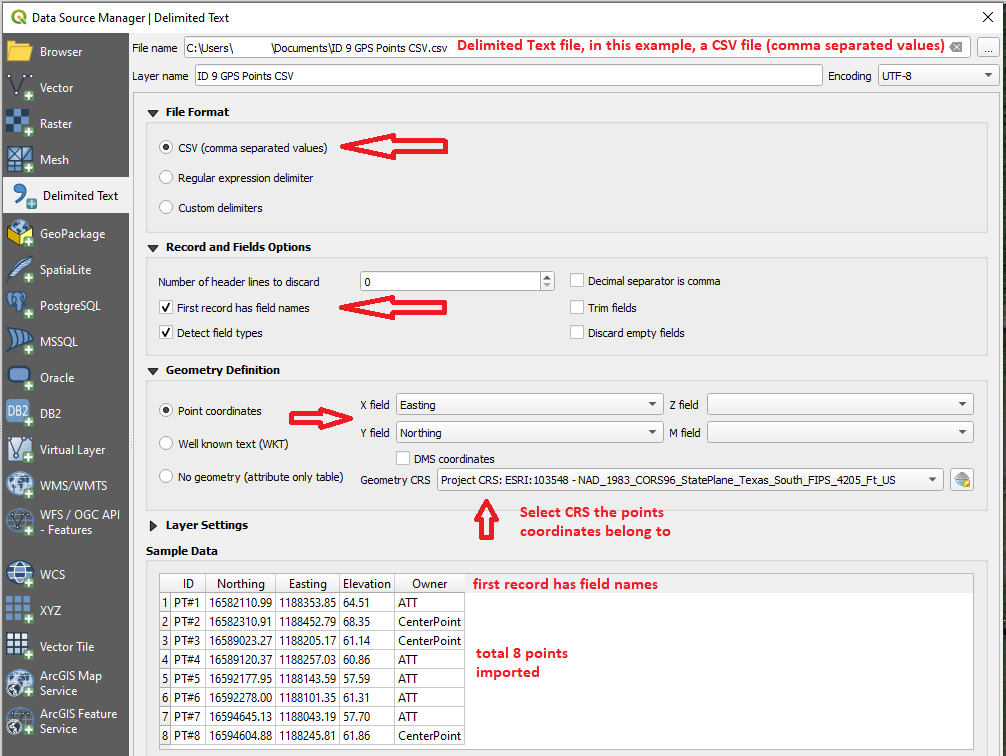
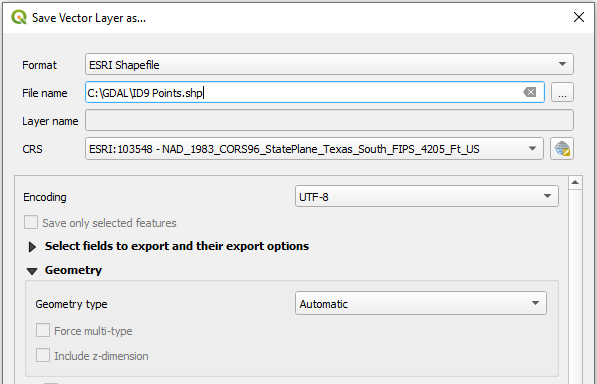
The above CSV file can be imported to QGIS and then converted to a point shapefile. First open Data Source Manager and click “Delimited Text” on the left to select the CSV file to be imported (ID 9 GPS Points CSV in Figure 3). Make sure to check on or enable appropriate optional items as shown in Figure 3 and click “Add” button to add the CSV file to Layer’s panel of QGIS. Right click the CSV file in the Layer’s panel to Export—>Save Features As… and save the CSV file as a point shapefile (Figure 4).
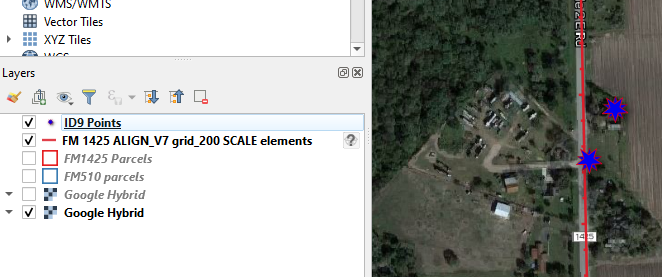
The converted point shapefile ID9 Points.shp is shown in Figure 5 and Figure 6. As shown in Figure 5, the point shapefile attribute table is exactly the same as the original CSV file.
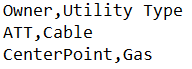
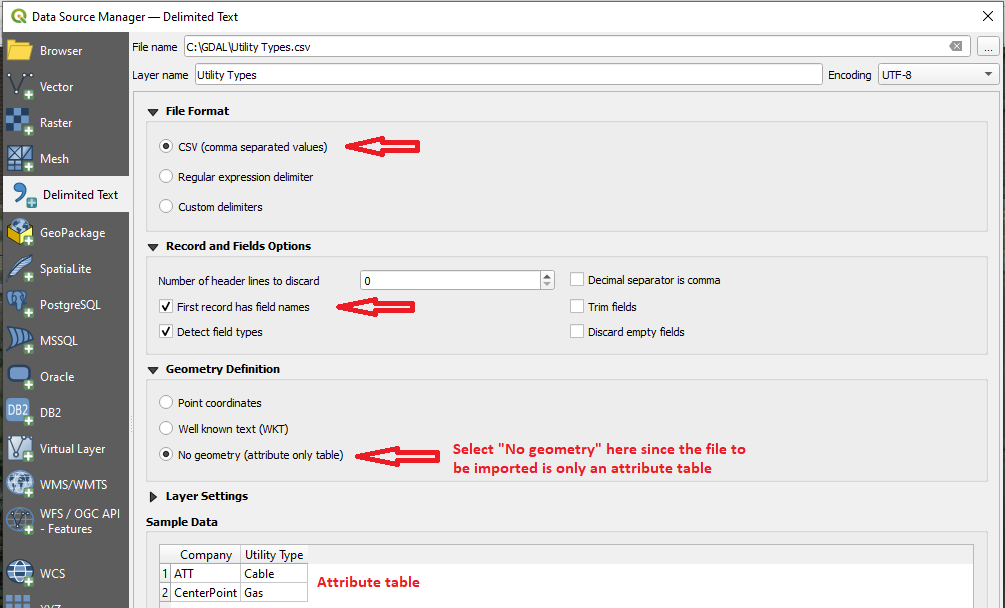
The attribute table of ID9 Points.shp can be expanded by adding additional information using join attribute table function of QGIS. Assume we want to add an additional column of utility type to attribute table in Figure 5: for ATT, the utility pipe type is Cable and for CenterPoint, the utility pipe type is Gas. We can first create an utility type table in CSV format as shown in Figure 7 using notepad, and then add this utility type table onto QGIS using Data Source Manager – Delimited Text (Figure 8). The Geometry Definition should be chosen as “No geometry” since this is simply a utility type table without northing/easting or longitude/latitude information, which is different from importing the SUE points table in Figure 3.
There are two ways to join the utility type table to the attribute table of ID9 Points.shp: 1) using the “Joins” function of Layer Properties; 2) using the command of “Join attributes by field value“.
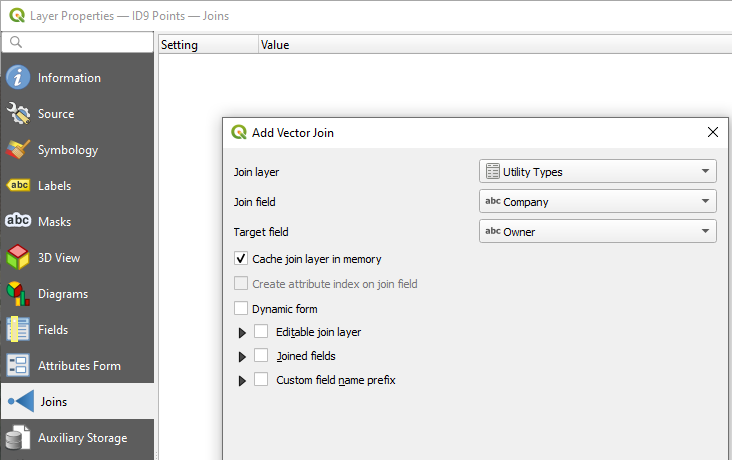
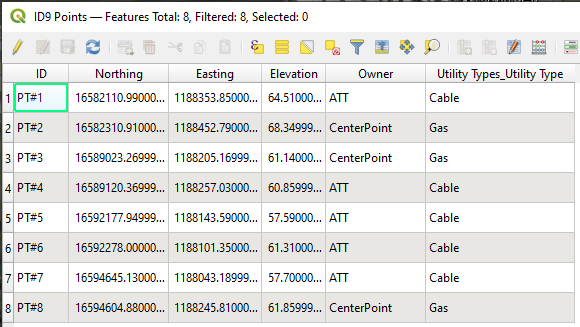
1). Joins: Right click the shapefile and open its layer properties window. Click “Joins” on the left and click the green color plus sign (“+”) on the bottom to join the utility type table (Figure 9) to the attribute table. The Join field from utility types file is Company and the Target field in the shapefile attribute table is Owner (the values in these two fields need to match to join). Click apply and re-open the attribute table of the shapefile, its attribute table is expanded by including utility type information (the last column) as shown in Figure 10. This expanded attribute table is in dynamic state and it only is valid when you have the utility type table selected in “Joins”. You can choose to “Export—>Save Feature As…” to save a new copy of the shapefile and this newly saved copy of the shapefile will then include the new column (utility type) permanently.
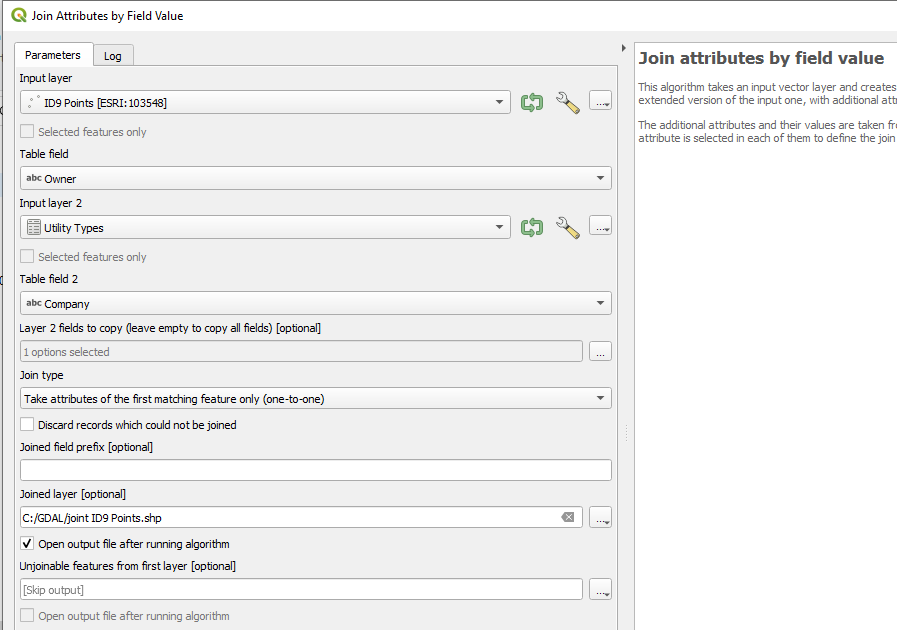
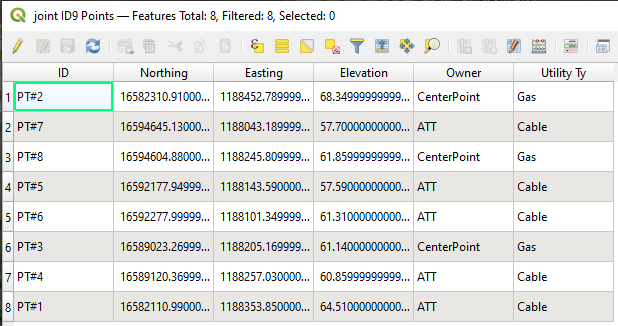
2). Join attributes by field value: Open the command by searching its name in Processing Toolbox. The Input layer is the shapefile you want to expand the attribute table and the Input layer 2 is the utility type table. “Owner” and “Company” are the two fields you need to select for these two layers respectively (Figure 11). Type in a new shapefile name under “Joined layer (optional)” and the newly created shapefile (joint ID9 Points.shp in Figure 11) will have the utility type column included as part of its attribute table permanently (Figure 12).
Leave a Reply