Download National Hydrography Dataset (NHD) from National Map Viewer by USGS
The USGS National Hydrography Dataset (NHD) represents the water drainage network of the United States with features such as rivers, streams, canals, lakes, ponds, coastline, dams, and stream gages. The Watershed Boundary Dataset (WBD) is a seamless, national hydrologic unit dataset which is companion dataset to NHD.
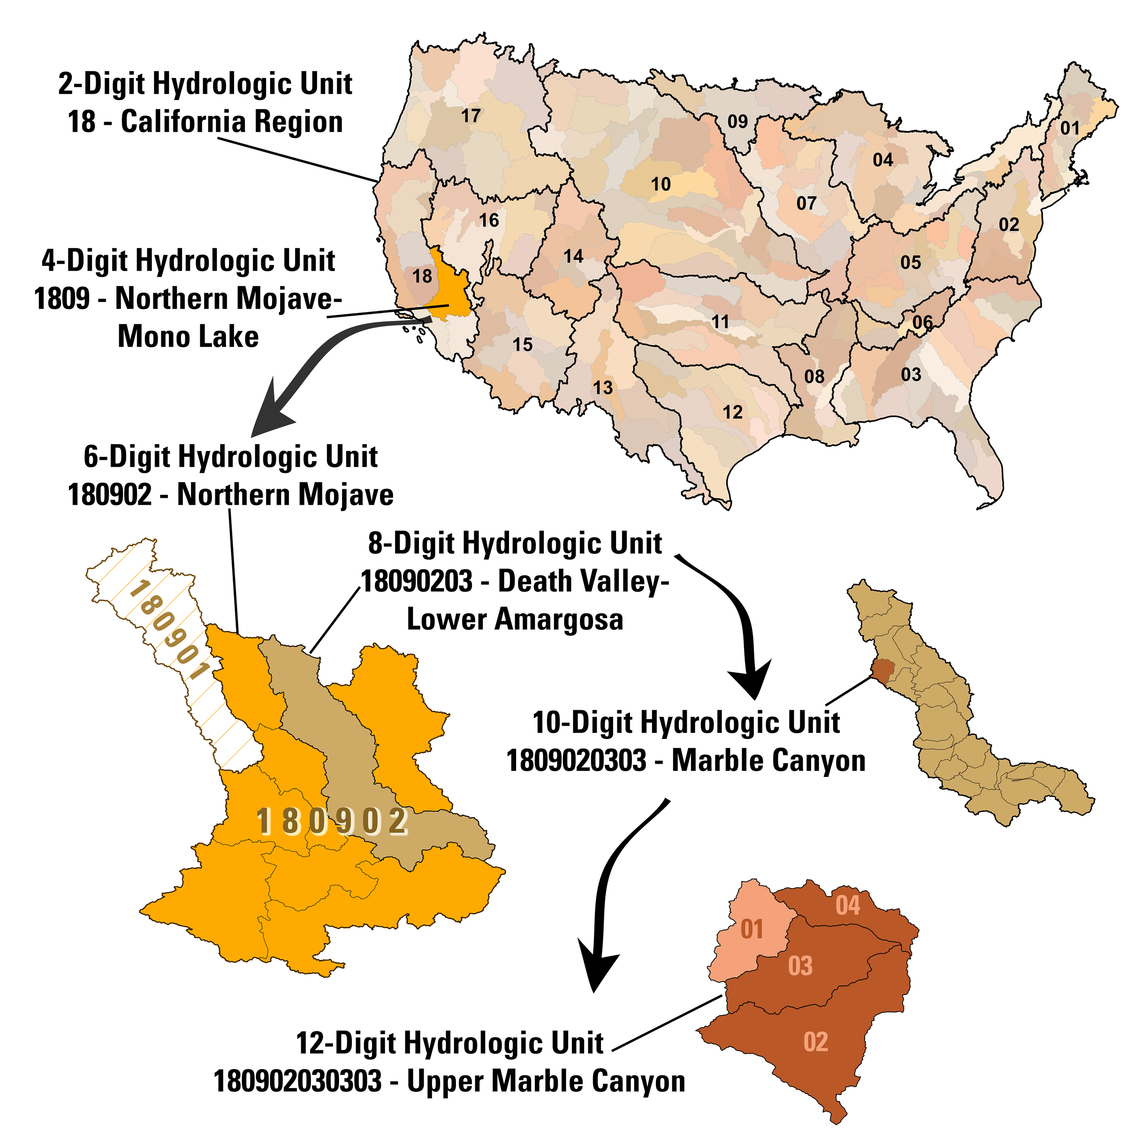
Hydrologic unit codes (HUC) in WBD are developed using a progressive two-digit system where each successively smaller areal unit is identified by adding two digits to the identifying code the smaller unit is nested within. WBD contains eight levels of progressive hydrologic units identified by unique 2- to 16-digit codes (Figure 1). The dataset is complete for the United States to the 12-digit hydrologic unit. The 14- and 16-digit hydrologic units are not complete for the nation . The NHD dataset downloaded from USGS National Map includes HUC data.
This post is a step by step instruction on how to download a NHD dataset for your project area. The example project site is Bear Creek watershed, located at about 9 miles west of Johnsonburg, PA (Figure 2).
- Before downloading NHD dataset, go to NHD Availability Map Website to figure out HUC 2 and HUC 4 unit number for your project area. The project site of Bear Creek in this demo has HUC 2 unit number of 05 and HUC 4 unit number of 0501.
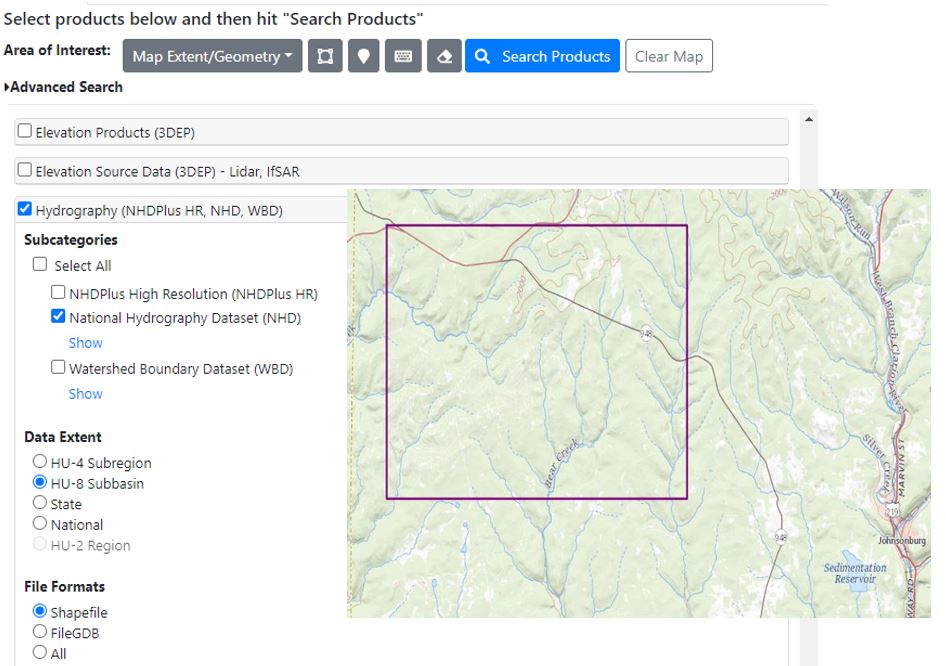
- Go to USGS National Map and zoom in to the project area. Draw bounding box to define your Area of Interest (Figure 2). Check on National Hydrography Dataset (NHD) under Hydrography (NHDPlus HR, NHD, WBD) on the left side for Data type. Select the Data Extent appropriately depending on your study area sizes and needs (HU-2 Region, HU-4 Subregion, HU-8 Subbasin, State, or National) and check File Formats as “Shapefile” or “FileGDB”. QGIS can handle both file types but it is common to choose “Shapefile” when using QGIS for spatial analysis.
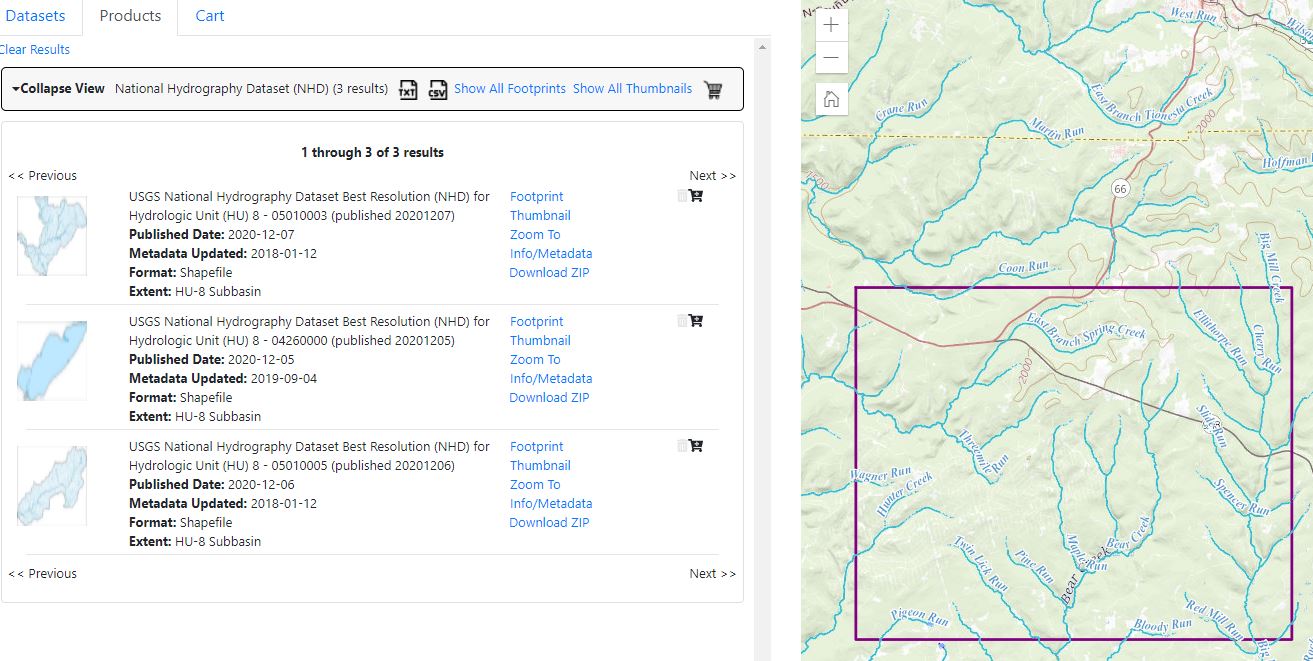
- Click Search Products on the top menu and the available NHD files of your area of interest will be shown on the next page (Figure 3). Click Thumbnail and/or Footprint (on/off) of each NHD file to show their coverage areas. If you are satisfied with one or multiple NHD files, click Download ZIP for downloading. In this demo (Figure 3), three NHD files are found, by showing the thumbnails of the three files on and off, it is determined that the third NHD file (HUC_8 05010005) is the one covering the project area and is downloaded.
- The downloaded NHD shapefiles are in reference to CRS EPSG 4269 in units of decimal degrees, horizontally referenced to the North American Datum of 1983 or NAD83. In order to perform hydrology spatial analysis, normally you will need to re-project them to a projected CRS like UTM (for continental USA, UTM NAD83 Zone 10N to 19N from west coast to east coast), or State Plane Coordinate System. The demo project area NHD shapefile will be re-projected to UTM Zone 17N EPSG26917 (see Step 6).
- Load WBDHU12.shp (EPSG 4269) in the downloaded NHD zip files to QGIS and load google map as background image. It is easy to find out that the project area of Bear Creek is within HUC12 050100050603 as shown in Figure 4.
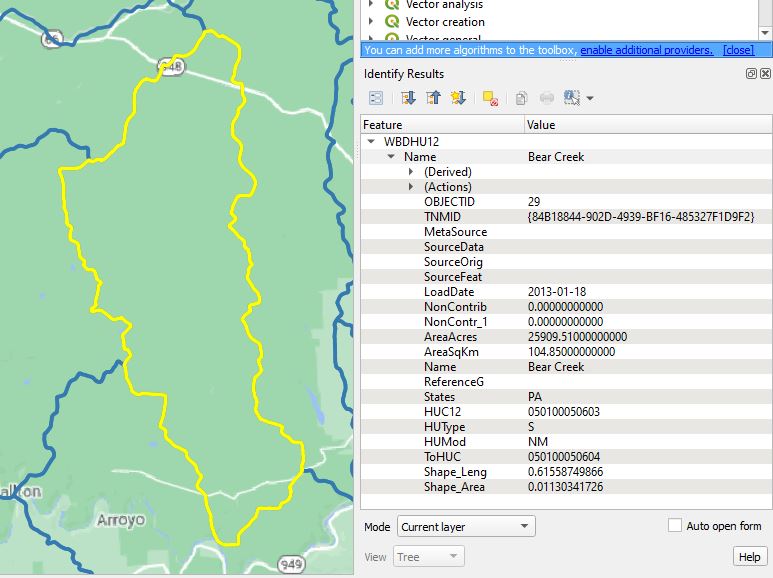
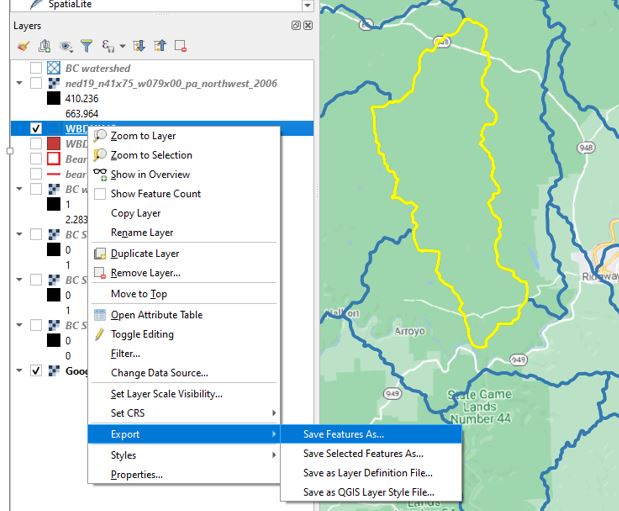
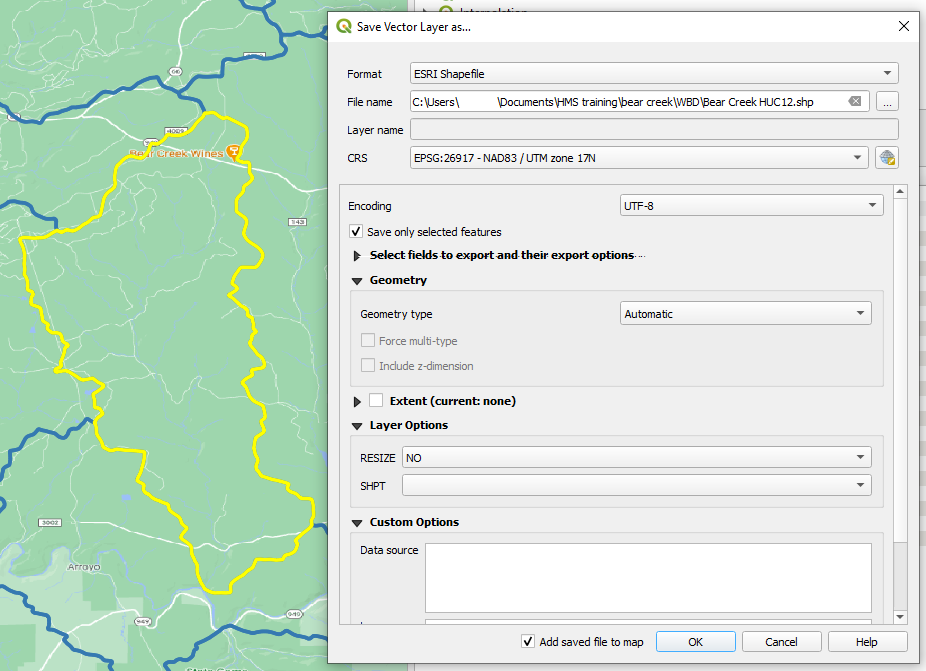
- In QGIS, save the selected feature of HUC12 050100050603 (the yellow highlighted polygon in Figure 4) to a separate shapefile by right click WBDHU12.shp in the layer panel and select Export and then Save Features As… (Figure 5). In fact you can re-project this to-be-saved shapefile to a new projection CRS (EPSG 26917 – NAD83/UTM Zone 17N for this demo) at the same time when using Save Features As… (Figure 6). Make sure to check on Save only selected features option so that you don’t end up with a large shapefile with features that you do not need.
Leave a Reply