Raster file, Resolution, Extent, No Data Value in QGIS
A raster file is a matrix of predefined cells (pixels) with certain number of rows and columns. The level of detail represented by a raster depends on the cell (pixel) size, or spatial resolution. In Figure 1, a pixel represents an area of surface on the Earth and because each pixel in the raster represents a 1 m x 1 m area, the raster has a 1 m resolution.
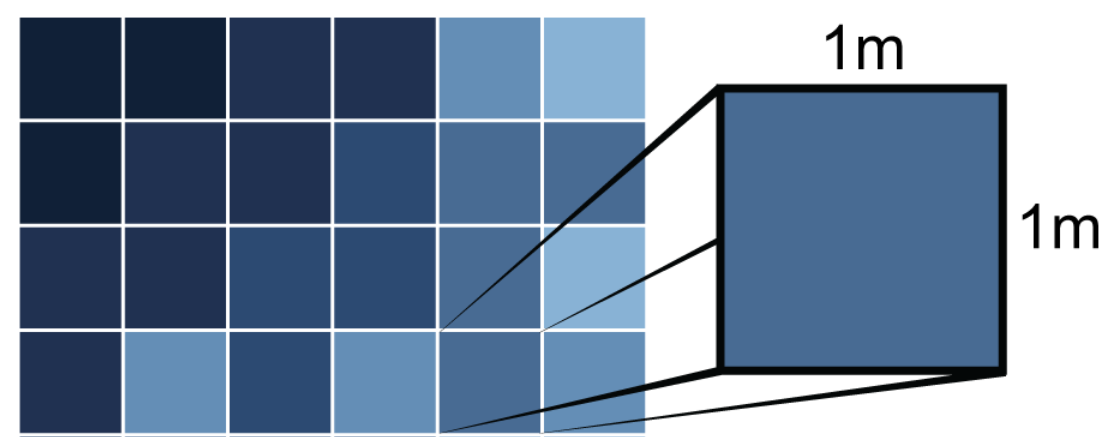
A pixel in a raster file either has a valid value (normal value) or a NoData value (a NoData pixel). For example, in an earth surface DEM raster file, the Nodata value can be assigned as -9999 since -9999 is normally not a valid elevation value; any pixel with a value -9999 is a NoData pixel. It should be noted that a raster may NOT have a NoData value defined, and for this type of raster, its NoData value is N/A or not defined.
A raster file extent is always a rectangle, so even if you see only the valid data value of a raster (Figure 2), its extent also includes NoData pixels (Figure 3). In QGIS, a raster’s NoData value can be found under Layer Properties –> Information (Figure 4).
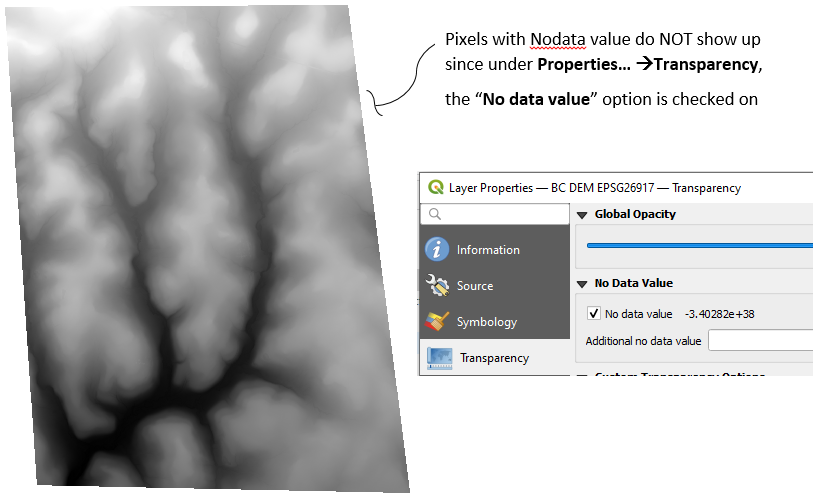
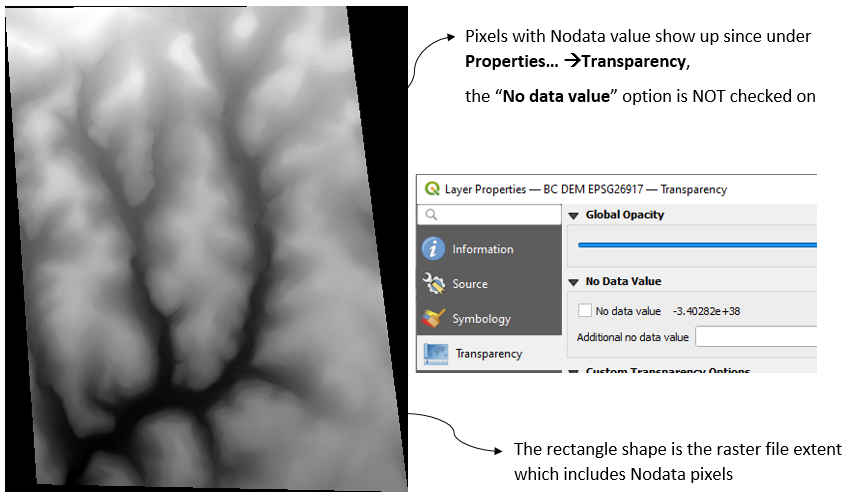
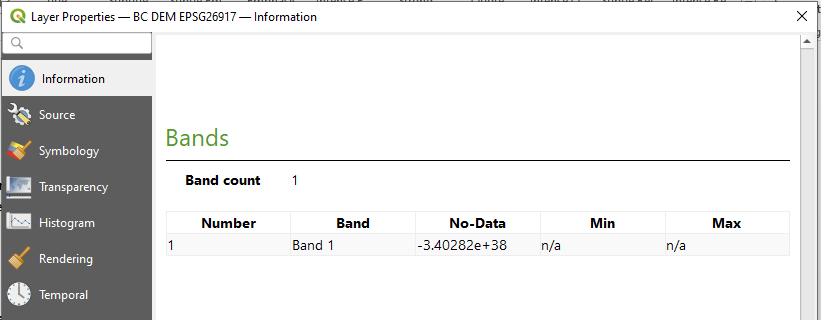
For the raster in Figure 2 and Figure 3, its NoData value is -3.40282e+38 which is one of the default NoData values used by QGIS. There is an option to type in “Additional no data value” as shown in Figure 2 and Figure 3, for example, if you DO NOT want the pixels with value of 1200 to be displayed, you can enter 1200 in “Additional no data value” and the pixels of 1200 display will be turned off when you also check on “No data value“. This option only let QGIS treat 1200 the same way as the NoData value of -3.40282e+38 for display purpose and it DOES NOT make 1200 an actual NoData value.
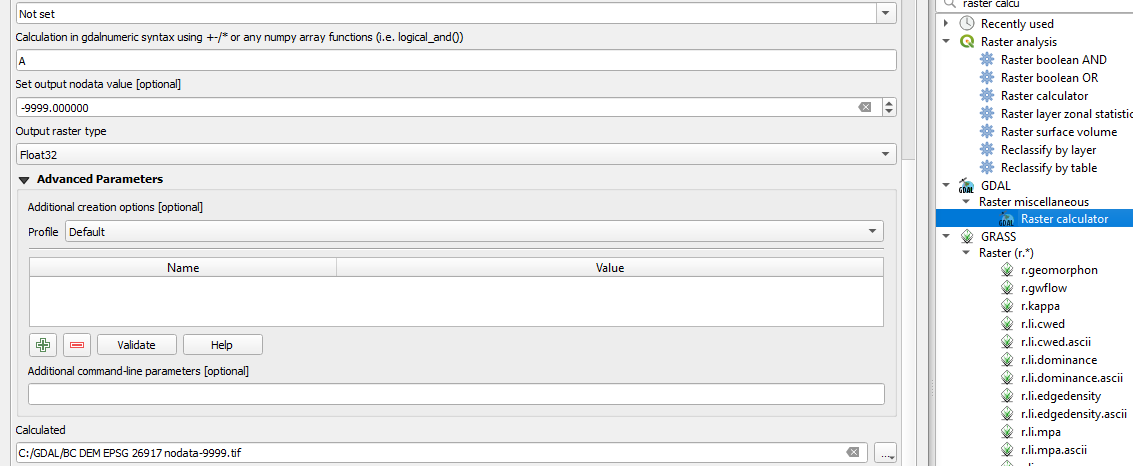
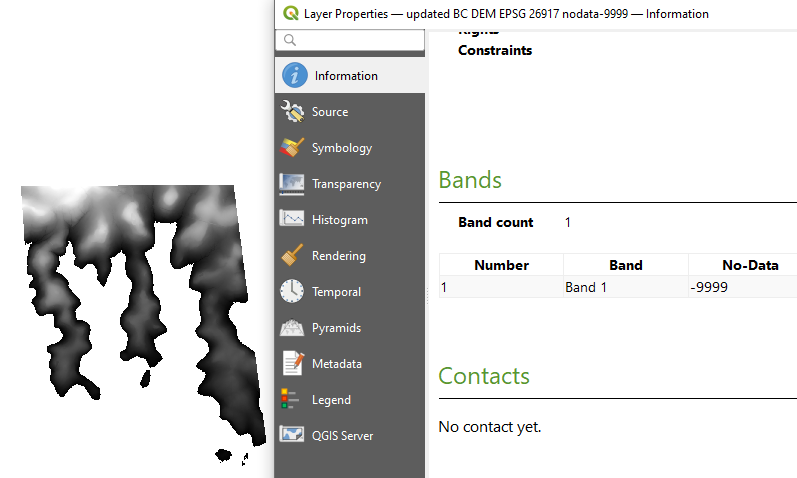
QGIS have the capability to replace the current NoData value (-3.40282e+38 for the raster in Figure 2) with a new one. To do so, open GDAL Raster Calculator (not the normal raster calculator under the top menu of Raster), select the raster file you want to replace its NoData value as Input layer A while leave Input layer B to F blank; in the Calculation in gdalnumeric syntax field, simply type in “A” since you want to keep the raster file’s valid data value; enter the new NoData value (-9999 in this example) and type in a new raster file name (Figure 5). Go to the new raster file’s Layer Properties –> Information to check its new NoData value for confirmation (Figure 6).

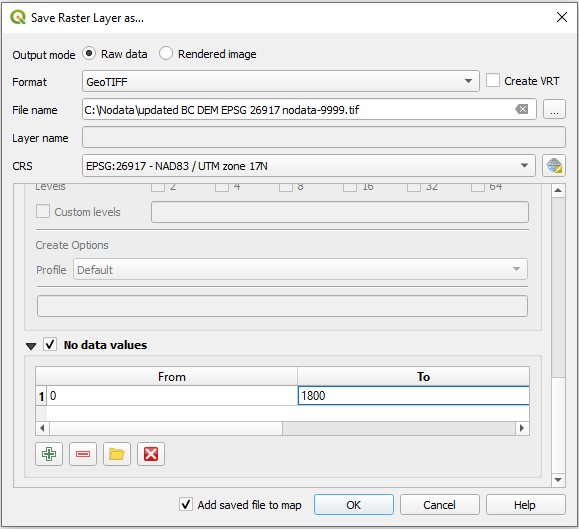
Pixels with valid data values can be converted to NoData pixels. For example, for the newly created raster file in Figure 6 with NoData value of -9999, let’s say for some reason, we don’t need areas with elevations lower than 1800 ft (the raster elevation ranges from 1521.97 to 2017.11) and we want to convert their pixels with values from zero to 1800 to NoData pixels: right click the raster file, select Export –> Save As… (Figure 7), check on No data values option and click the plus sign “+” to add a data range from zero 1800 to convert pixels with elevation less than 1800 to Nodata pixels (-9999 as NoData value for this sample file). Figure 8 shows the converted raster which covers a smaller area than the original raster in Figure 2 since the areas lower than 1800ft are “NoData value” now.
To export a raster’s extent as a polygon shapefile (a rectangle), search “extract layer extent” in processing toolbox to get a polygon shapefile consisting of a rectangle representing raster’s extent. Another way to get the extent rectangle shapefile is to click top menu Raster then select Miscellaneous —> Tile Index… .
If you need the actual boundary of a raster (only pixels with valid values, excluding NoData pixels), search “raster pixels to polygons” in processing toolbox to get a polygon shapefile consisting of a group of polygons for pixels with valid values (Note this shapefile is usually pretty big and the next step to dissolve it takes quite some time). To get the boundary as a single polygon, “dissolve” the newly created polygon shapefile.
Leave a Reply