GIS Functions and Application of RAS Mapper in HEC-RAS V6
RAS Mapper of HEC-RAS Version 6 has some basic but useful GIS functions to complete some GIS operations and spatial analyses common to HEC-RAS modeling, although it could not replace GIS tools such ArcMap or QGIS. This post is to introduce some useful functions of RAS Mapper related to GIS applications.
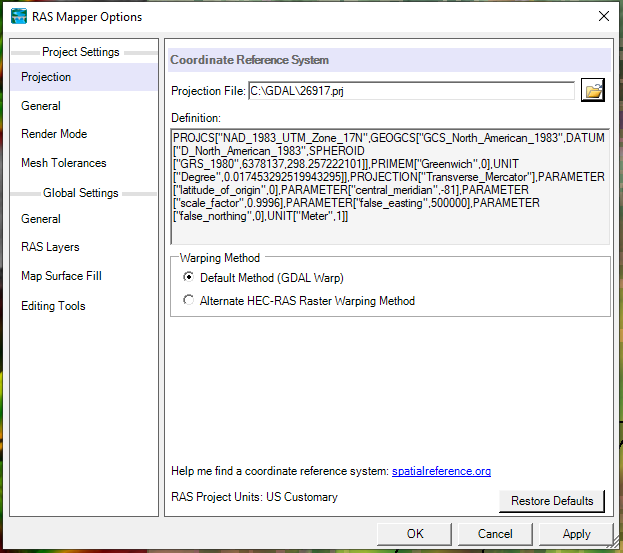
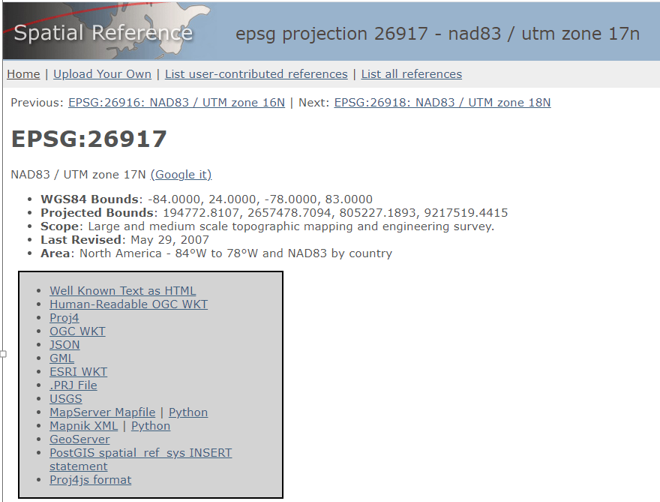
- Projection (Coordination Reference System, or CRS): Defining a projection system should be the first thing to do for a new HEC-RAS project. Open RAS Mapper, go to top menu Project —> Set Projection… to select a projection file for the project (Figure 1). You can use a known shapefile’s projection file (*.prj) or visit https://spatialreference.org/ to search and download a *.prj file as shown in Figure 2. Don’t confuse the projection file (*.prj) with HEC-RAS project file since both have “.prj” as file extension. State plane coordinate system, UTM, or other projection systems (CRS) required by clients are the common projections used for HEC-RAS modeling.
- Re-projection: Imported external files such as shapefiles, terrain, soils layer files, and land cover files are not necessarily to be in the same projection system as the one defined for a HEC-RAS project. RAS Mapper can re-project external files to a HEC-RAS project’s projection system when the external files are being imported or converted.
- Add new geometries, including lines, polygons. Example – add a new 2D flow area perimeter:
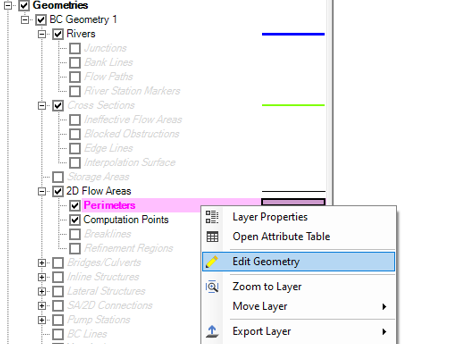
- Right click Perimeters under Geometries – 2D Flow Areas and select Edit Geometry (Figure 3)
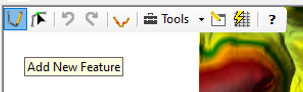
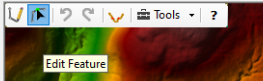
- Geometry editing tool bar is activated and will show up at the top of map view window as shown in Figure 4. The first button on the left is to add new feature and the one next to it on the right is to edit feature.
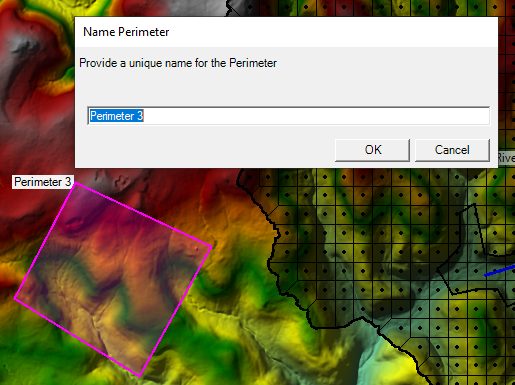
- To add a polygon for a new 2D flow area perimeter, click mouse at the desired polygon vertex locations continuously and double click the last vertex to close the polygon and end the adding polygon operation. Give the new polygon a unique name and then type in 2D flow area parameters such as cell spacing on the next window (Figure 5).
- Edit/change an existing polygon. Example – edit an existing 2D flow area perimeter:
- Right click Perimeters under Geometries – 2D Flow Areas and select Edit Geometry (Figure 3)
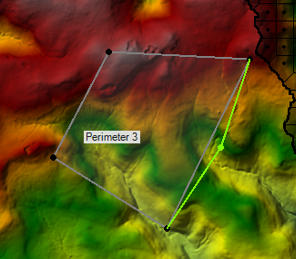
- Click the 2nd button on the left of geometry editing tool bar to activate “Edit Feature” function (Figure 6).
- Double click the polygons you want to edit, hover mouse over the existing vertex, hold the mouse and move it to a new location; or place mouse cursor in between two existing vertices to insert a new vertex (Figure 7).
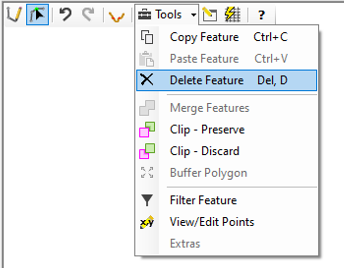
- To delete an existing feature, first click the feature you want to delete, then go to geometry editing tool bar to pull down the Tools menu to select Delete Feature to delete feature you just selected (Figure 8).
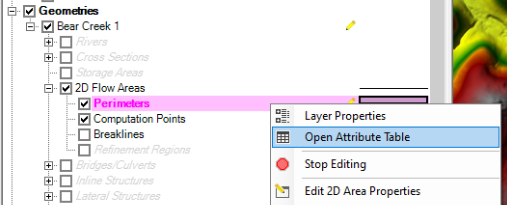
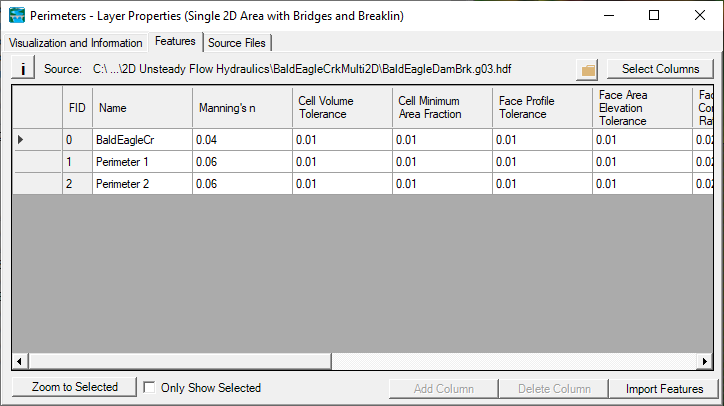
- Another way to edit an existing feature is to right click the geometry (Figure 9), and click Open Attribute Table and to edit the feature in its attribute table (Figure 10).
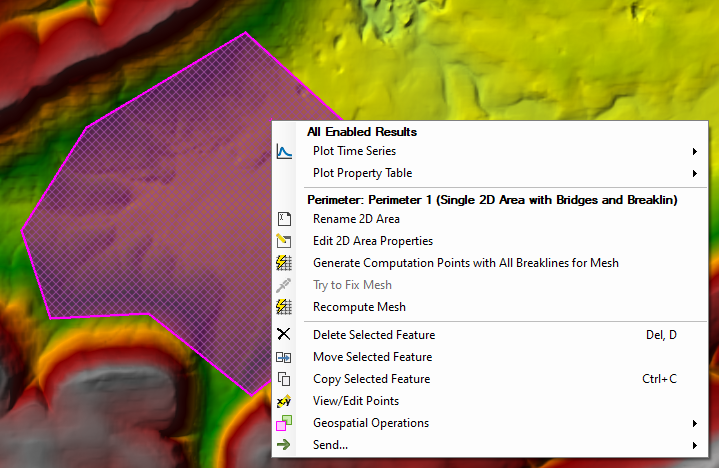
- In the map view window of RAS Mapper, right click a feature which is under edit mode and a menu will pop up for editing and other operations (Figure 11)
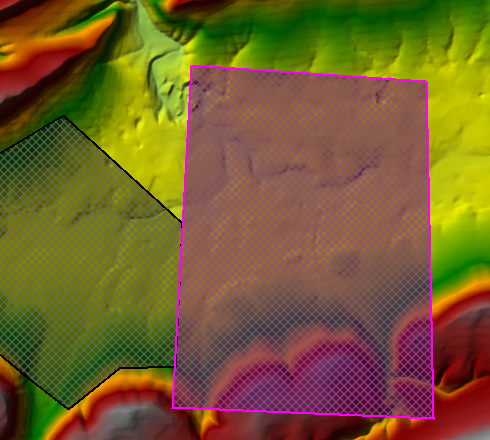
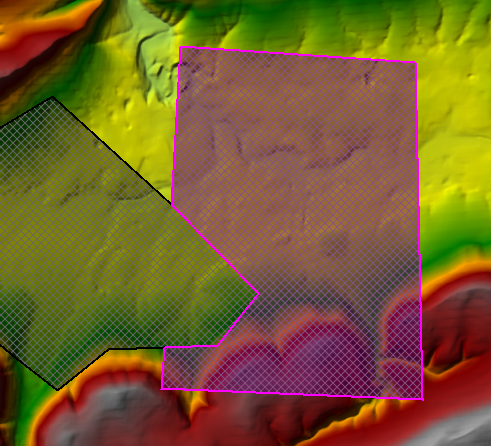
- Clipping: one of the two polygons that are overlapping can be clipped by the other. In Figure 12, right click the 2D flow area polygon on the right and select Geospatial Operations —> Clip – Preserve. The 2D flow area polygon on the right will clip the 2D flow area polygon on the left and itself will be preserved (Figure 13).
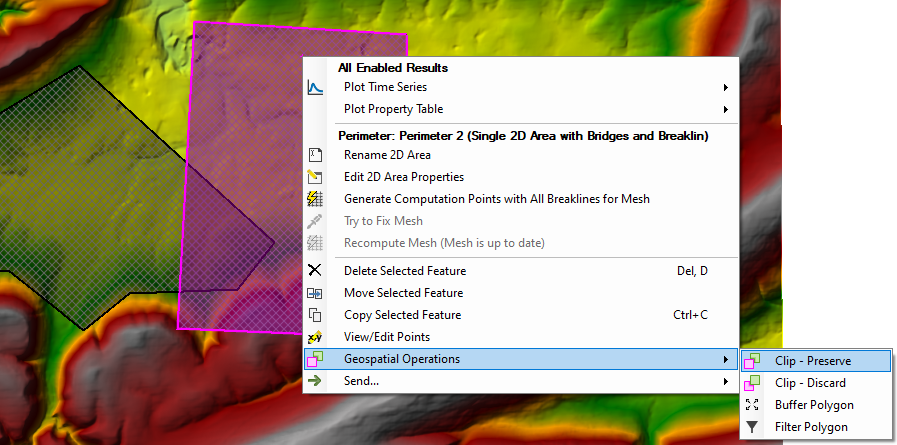
- In Figure 12, if select Geospatial Operations —> Clip – Discard, the 2D flow area polygon on the right will be clipped by the 2D flow area polygon on the left (Figure 14). In this scenario, the 2D flow area on the left will be preserved.
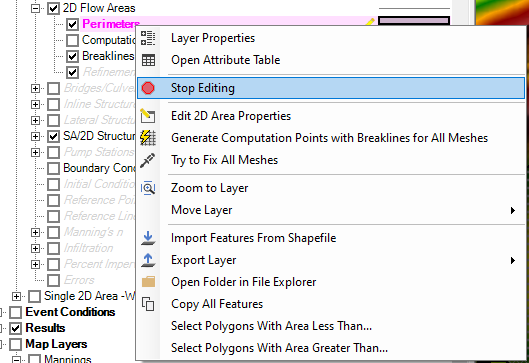
- Always remember to click Stop Editing at the end if you are satisfied with the geometries (Figure 15), to save all the changes you have made.
- Export geometry features to a shapefile or a google earth KML file: Example – export 2D flow area perimeter as shapefile
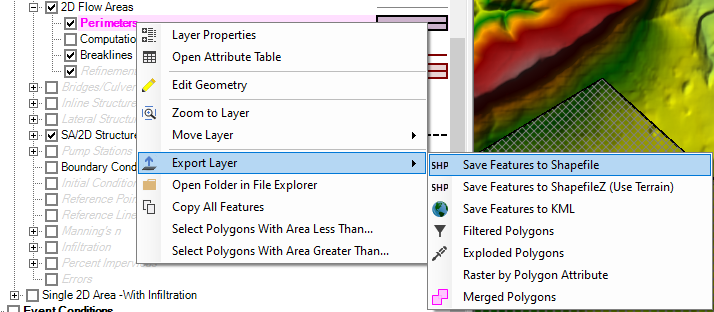
- Right click Perimeters under Geometries – 2D Flow Areas and click Export Layer
- Select Save Features to Shapefile after clicking Export Layer (Figure 16); or Select Save Features to KML to save as a google earth KML file.
- Import external shapefiles to various items under Geometries: if you have a shapefile prepared outside HEC-RAS for various HEC-RAS geometry items, such as 2D flow area perimeter, river center line, cross section cutting lines, Manning’s n Calibration Regions, you can import these shapefiles directly instead of drawing them manually in RAS Mapper. The following example is to illustrate importing a shapefile to Manning’s n Calibration Region:
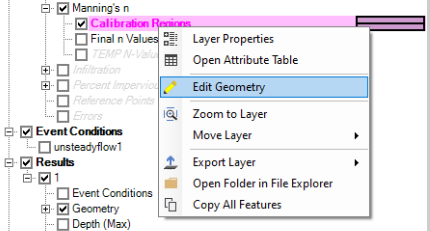
- Right click Calibration Regions under Geometries – Manning’s n and select Edit Geometry (Figure 17) to make it editable.
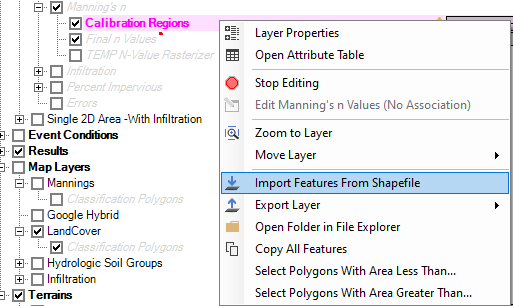
- Right click Calibration Regions and select Import Features From Shapefile (Figure 18)
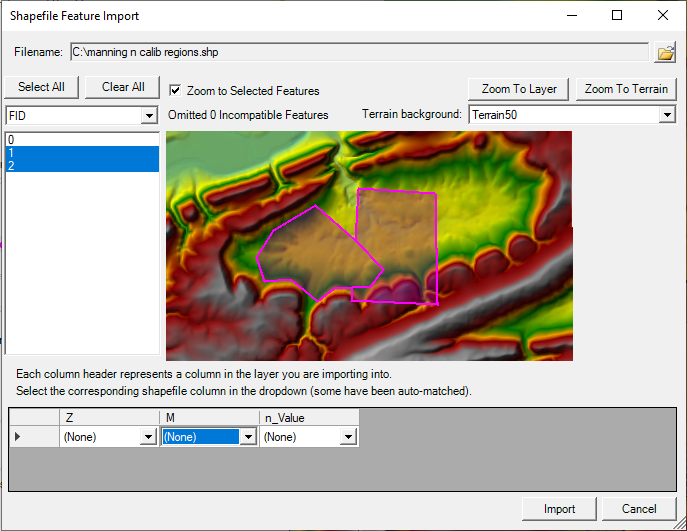
- Import Shapefile prepared outside RAS Mapper. As shown in Figure 19, the shapefile to be imported contains three polygons (FID=0, 1, and 2). Select FID=1 and 2 since these two are the desired regions and click Import button to complete importing.
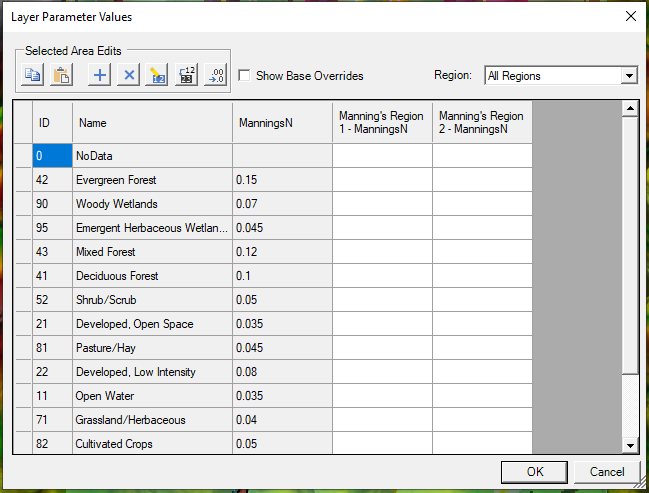
- Right click Calibration Regions and select Edit Manning’s n Values to type in Manning’s n values for the two calibration regions just imported (Figure 20).
- Make sure to click Stop Editing when importing and Manning’s n value additions are done.
Leave a Reply