NOAA Atlas 14 Precipitation and Temporal Distribution in XPSWMM
NOAA Atlas 14 provides the latest official U.S. precipitation frequency (PF) estimates for selected durations and frequencies. For its introduction and basic application including point precipitation depth and temporal distribution, please refer to this post. The following is to discuss how to import NOAA Atlas 14 temporal distribution templates (*.xpx file) to XPSWMM and how to create your own design storm.
XPSWMM has developed NOAA 14 temporal distribution templates (*.xpx) for several regions and they can be downloaded from XPSWMM help website. For regions not available there, you can develop your own xpx files using text file editor by referring to the existing xpx file format and the temporal distributions of your area of interest. In this post, the xpx files of Atlas 14 Volume 11 for Texas Region 2 are downloaded and unzipped first from XPSWMM help website in order to illustrate the steps of working with them in XPSWMM.
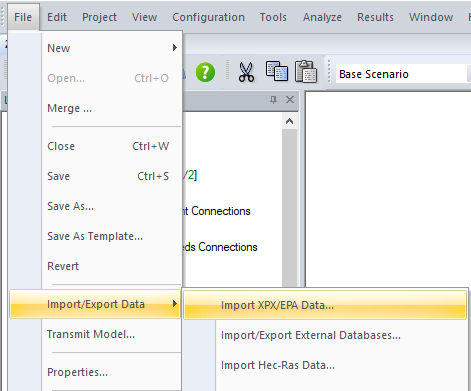
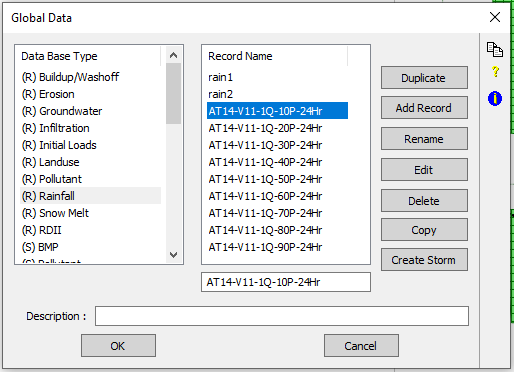
First, import the downloaded xpx files to XPSWMM by go to File—>Import/Export Data—>Import XPX/EPA Data… (Figure 1). After importing the xpx files you select, they will show up in the Global Data—>(R) Rainfall (Figure 2). In this example, we only import the 9 distributions (10P to 90P) of the first quartile for 24-hr rainfall duration in Texas Region 2.
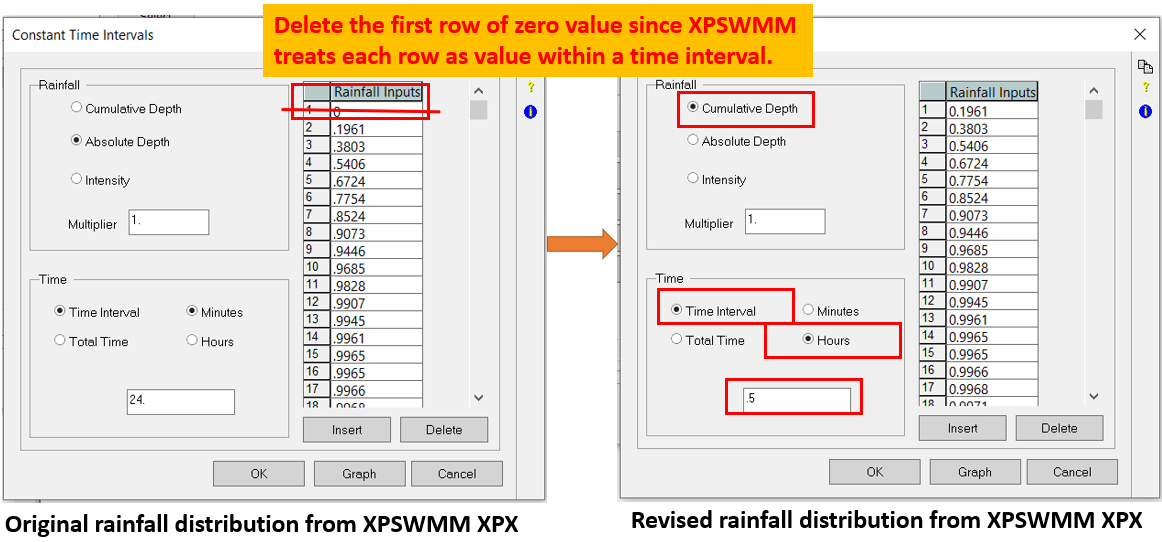
The imported rainfall percent curves are standard distributions with unit rainfall depth (1.0 inch). Click each one of the distributions to edit some settings slightly before using them. First, since XPSWMM treats each row in a rainfall distribution table as a value within a time interval, the first row of zero value should be removed from the table; secondly, the rainfall distribution is in terms of Cumulative Depth and the time interval is 0.5hr (24hr is the total time for this example); and finally the Multiplier is 1.0 since this is a standard or base distribution. After everything looks good, click OK to return to the screen of Figure 2.
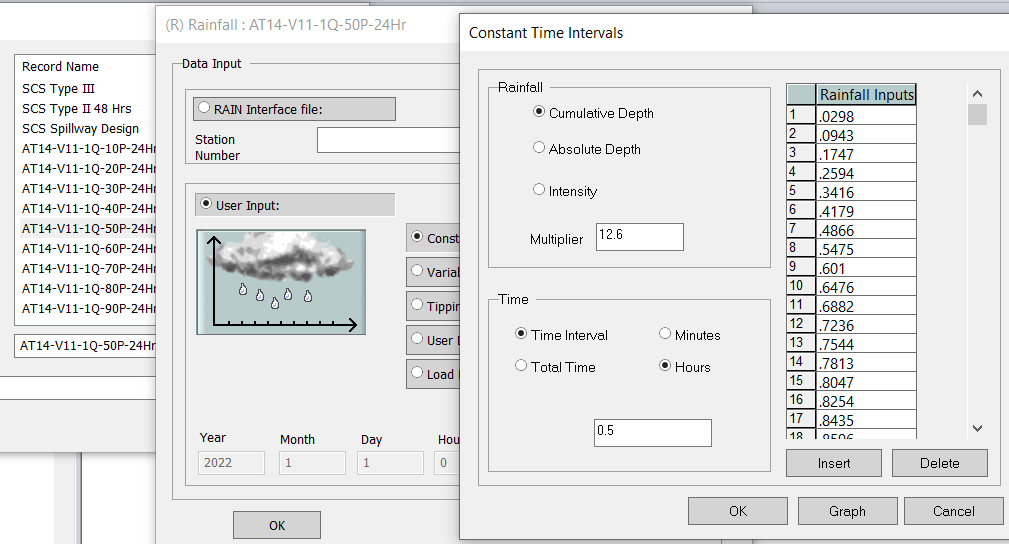
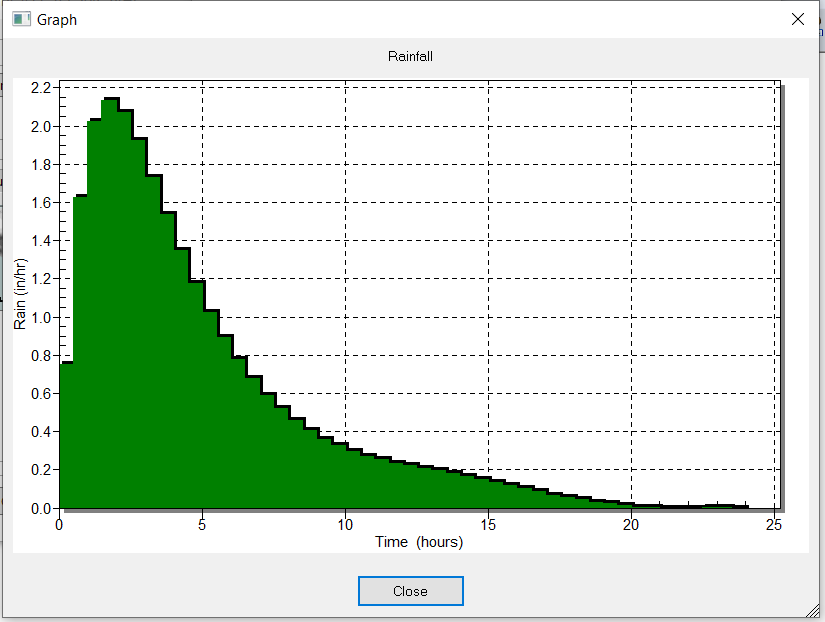
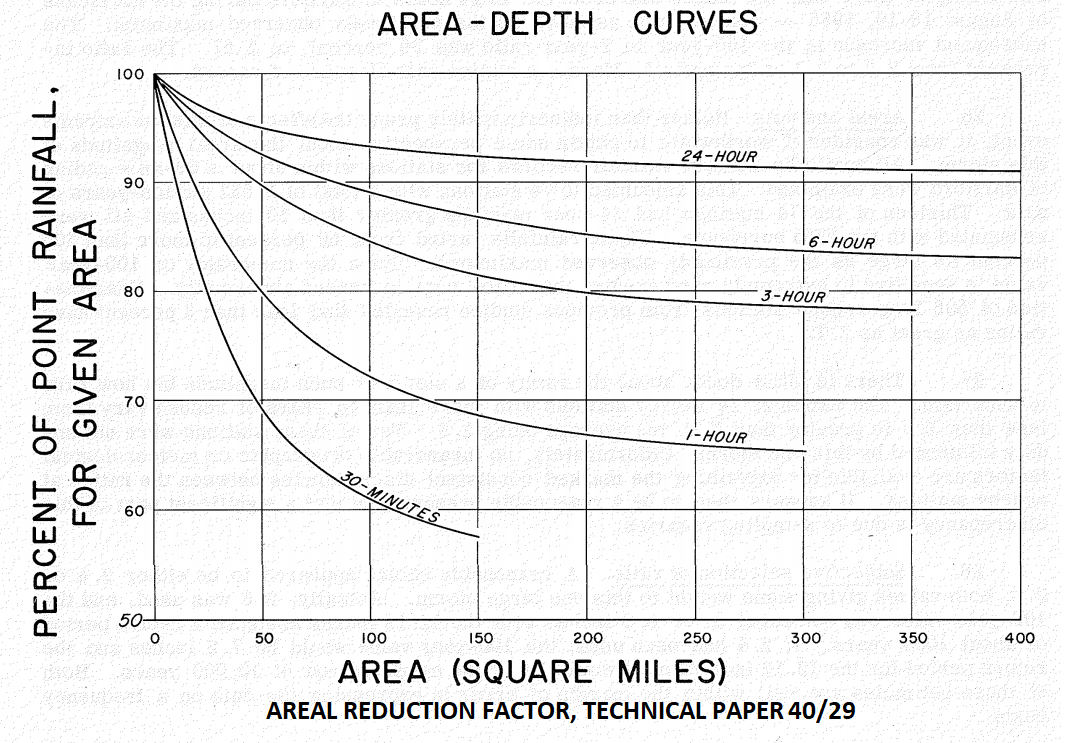
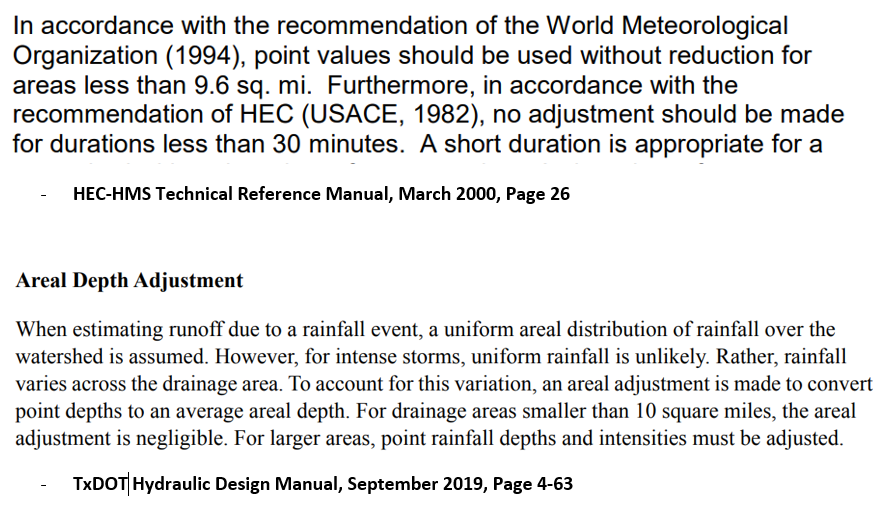
To create your own design storm with the point precipitation depth of your area of interest (12.6 inch for Austin, TX 24-hr 100-year), duplicate the standard rainfall distribution you prefer (50Percent 24hr of first quartile in this example), rename it (Test-1Q-50P-24Hr in this example) and then edit it by typing in the point precipitation depth (Figure 4). Now you have created your own design storm hyetograph named Test-1Q-50P-24Hr (Figure 5). If you need to apply an areal reduction factor (Figure 6) to reduce the point precipitation depth for a large watershed (Figure 7), the multiplier in Figure 4 can be further reduced to “Point Precipitation Depth x Areal Reduction Factor“
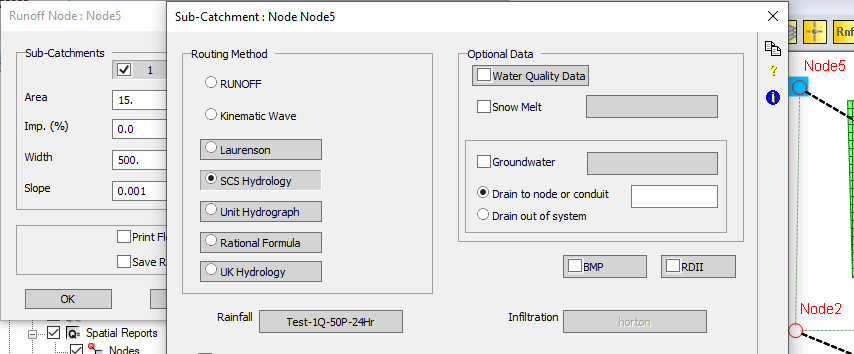
The new design storm can be applied in runoff mode of a node to calculate its runoff (Figure 8). In Figure 8, the Rainfall is selected as Test-1Q-50P-24Hr, which is the design storm you just create. It should be noted that if you want the nodes runoff calculation to use the design storm selected in Figure 8, you should NOT turn on the Global Storms option in Runoff Job Control; otherwise the XPSWMM global storm setting would override the design storm for runoff calculation.
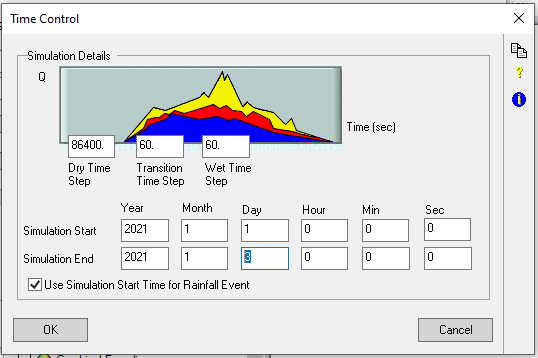
Switch XPSWMM to Runoff Mode, click Runoff Job Control setting and open Time Control window (Figure 9). In Figure 9, type in appropriate simulation start and end day and time to ensure the runoff mode is running for at least the duration of the design storm.
Leave a Reply